Le meduse in vaso. Lavoretti per l’estate: un bel lavoretto estivo per bambini in età di scuola primaria che può essere declinato in tantissimi modi ed essere una decorazione per la cameretta, un modo per conservare le conchiglie raccolte sulla spiaggia, ed anche un gioco… Le meduse sono chemiluminescenti in natura, quindi si possono anche preparare vasi per esperimenti di luce.

Realizzare le meduse di pet è semplicissimo e dà grande soddisfazione; è sicuramente uno dei lavoretti per l’estate più semplice e versatile; trovi il tutorial qui: “Meduse di pet”.
Nota: a seconda della grandezza del vaso scelto, la medusa può comportarsi in modi diversi. Se il vaso è piccolo può succedere che affondi o che si posizioni sempre “a testa in giù”. Se vi succede, inserite un palloncino nella testa e il problema è risolto. Se il vaso è molto alto, può succedere che la medusa galleggi invece troppo: basterà zavorrarla legandola a un sasso. Se dopo qualche settimana la medusa zavorrata dovesse affondare, ricorrete all’aggiunta del palloncino…
Medusa galleggiante per giocare

Il progetto più semplice è un vaso da gioco, che impegnerà il bambino a scuoterlo per vedere la sua medusa e gli altri elementi muoversi al suo interno.
Materiale occorrente:
– una medusa (controllare che sia abbastanza piccola da potersi muovere nel vaso anche posto in orizzontale)
– un vaso con coperchio
– acqua, brillantini e decorazioni a piacere
– un piccolo palloncino (tipo “bomba d’acqua) o un guanto di lattice monouso
– eventualmente colla a caldo per sigillare il coperchio.

Cosa fare:
gonfiate il palloncino e infilatelo nella testa della medusa:


mettete nel vaso gli elementi scelti e i brillantini. Quindi riempite di acqua fino all’orlo e appoggiate la medusa:
Chiudete bene col tappo (se volete sigillandolo con la colla a caldo) ed il vostro vaso è pronto.

Vaso decorativo di meduse e conchiglie
Questo progetto è “solo da guardare”. Fatto in famiglia può essere un bel modo per collezionare insieme alla medusa conchiglie e altri ricordini trovati in spiaggia.
Proposto come attività, ad esempio nel corso dei “Centri estivi” è anche un’idea economica e semplice per valorizzare le meduse e portarle a casa in una confezione scenografica e di grande effetto.

Cosa serve:
– due meduse
– acqua
– brillantini (se volete)
– due sassi più grandi e sassolini piccoli
– conchigliette
– filo trasparente
– un grande vaso di vetro con coperchio è la scelta più “elegante”, ma si può optare invece per quella più economica, soprattutto a scuola, utilizzando una bottiglia da bibite da 2l (e rinunciando al coperchio o ingegnandosi a costruirne uno, naturalmente)

Come si fa:
Tagliate il collo della bottiglia da due litri per ottenere il vaso che vi serve (altrimenti procuratevi un grande vaso di vetro):


Ora bisogna zavorrare le meduse; vi basterà legare il filo trasparente al sasso

e con l’ago infilare l’altro capo del filo e passarlo nella testa della medusa. Prendete la misura per ogni medusa usando come riferimento il vostro vaso, e possibilmente fate in modo che le due meduse possano trovarsi ad altezze diverse:


Mettete le due meduse zavorrate nel vaso (o nella bottiglia):


Aggiungete conchiglie e sassolini per creare un bel fondale e nascondere i sassi, e versate l’acqua ( se volete aggiungete i brillantini):
Il vostro vaso di meduse (bellissimo, ma molto difficile da fotografare, almeno per me), è pronto:


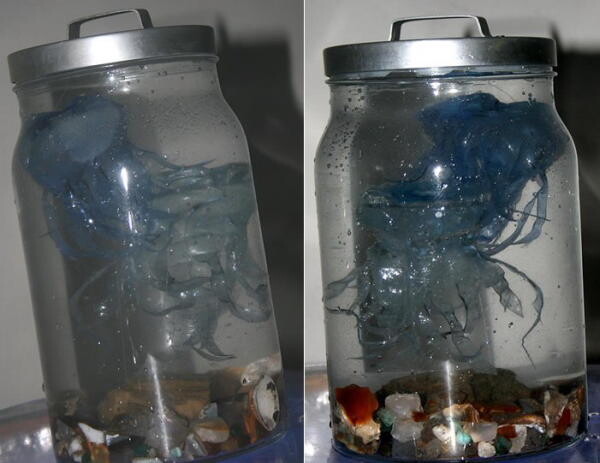
Vaso di meduse fluorescenti
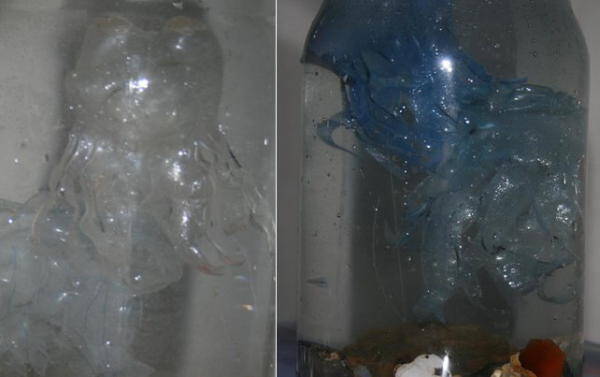
Il modo più semplice di realizzare meduse fluorescenti, è quello di versare nella testa acqua colorata con colore fluorescente e mettere a ghiacciare:

Coi bambini più grandi, se pensate di utilizzare anche la “luce nera”, potete anche ghiacciare in una medusa il colore fluorescente (meglio il giallo) e nell’altra dell’acqua tonica.


Il vaso sarà molto bello anche alla luce naturale; man mano il ghiaccio si scioglierà colorando l’acqua…

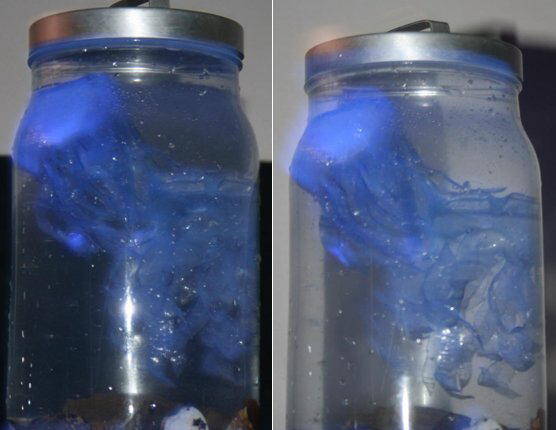
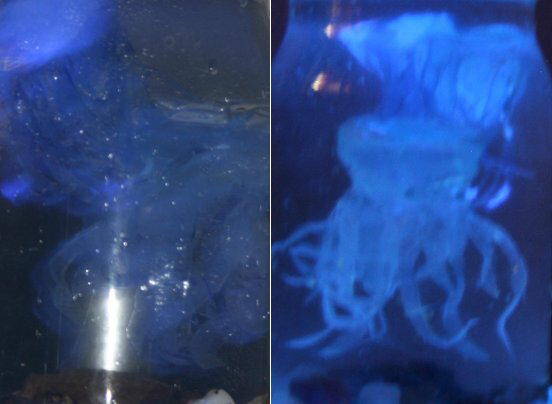
Vaso di meduse fluorescenti sotto lampada a “luce nera”
Possiamo sbizzarrirci con tutti gli elementi che sappiamo diventare fluorescenti se illuminati con la lampadina BLB… Ad esempio possiamo riempire un ovetto di plastica con acqua tonica:


oppure con colla a caldo:


E, rimanendo in tema di vasi e meduse, la medusa di pet può funzionare anche come “diavoletto di Cartesio”…

Jellyfish in pots. A nice summer craft for children of primary school age that may be declined in many ways and be a decoration for the bedroom, a way to preserve the shells collected on the beach, and even a game. Jellyfish are chemiluminescent in nature, so you can also prepare jars for experiments with light.
Make the PET jellyfish is simple and gives great satisfaction; It is definitely one of the easiest and versatile little jobs for the summer; you can find the tutorial here: “PET Jellyfish tutorial”.
Note: depending on the size of the jar chosen, the jellyfish can behave in different ways. If the jar is small it is possible that sink or that it is positioned always “upside down”. If there happens, insert a balloon in the head and the problem is solved. If the jar is very high, it is possible that the jellyfish floats too much: just ballast tying it to a pebble.
Jellyfish in pots – Jellyfish floating for playing
The simplest project is a pot for playing, which will involve the child to shake it to see his jellyfish and other elements move inside.
Jellyfish in pots – What do you need?
– A jellyfish (check that it is small enough to be able to move in the jar also placed horizontally)
– A jar with lid
– Water, glitter and decorations to taste
– A small balloon (type “water bomb”) or a disposable latex glove
– Possibly hot glue to seal the lid.
Jellyfish in pots – What to do?
inflate the balloon and plug it into the head of the jellyfish:
put in the jar elements chosen and glitter. Then filled with water to the brim and place the jellyfish:
Tightly close with the lid (if you want to sealing it with hot glue) and your jar is ready.
Jellyfish in pots – Decorative jar of jellyfish and shells
This project is “just by watching.” Done in the family can be a great way to collect along with jellyfish shells and other souvenirs found on the beach.
If it is proposed as activity, for example in the course of the “Summer centers” is also an idea economic and simple to enhance the jellyfish and take them home in a package scenic and impressive.
Jellyfish in pots – What do you need?
– Two jellyfish
– water
– Glitter (if you want)
– Two stones larger and small pebbles
– little shells
– Transparent thread
– A large glass jar with lid or a plastic bottle 2l
Jellyfish in pots – What to do?
Cut the neck of the two-liter bottle to get the jar you need (otherwise get yourself a big glass jar):
Now you need ballast jellyfish;Just tie the transparent thread to the stone
and with the needle thread the other end of the thread and pull it into the head of the jellyfish. Take the measurement for each jellyfish using as a reference your vessel, and possibly make sure that the two jellyfish may be at different heights:
Put the two jellyfish ballasted in the jar (or bottle):
Add shells and pebbles to create a beautiful backdrop and hide the stones, and pour the water (if you want to add the glitter):
Your jar of jellyfish (beautiful, but much difficult to photograph, at least for me), is ready:
Jellyfish in pots – Vaso di meduse fluorescenti
The easiest way to achieve fluorescent jellyfish, is to pour colored water in the head with fluorescent color and put to ice:
With older children, even if you plan to use the “black light”, you can even freeze in a jellyfish fluorescent color (preferably yellow) and in the other jellyfish tonic water.
the jar It will be very nice also to natural light; as the ice will melt by coloring the water:
Jellyfish in pots – Jar of fluorescent jellyfish under “black light” lamp
We can use all the elements that we know fluoresce when illuminated with light bulb BLB … For example we can fill a plastic egg with tonic water:
or hot glue:
And staying on the subject of jars and jellyfish, jellyfish pet can also function as “cartesian dive“.