Science experiment on soil erosion – This experiment, which has a tremendous visual impact due to its simplicity, it will demonstrate the relationship between precipitation, soil erosion, protection of watercourses and vegetation.
A very simple experiment that stresses the importance of the vegetation cover of the soil. You can propose in three versions: – Preparing the planting of seedlings – Using plants ready to be transplanted – Using soil samples.
Science experiment on soil erosion – First version
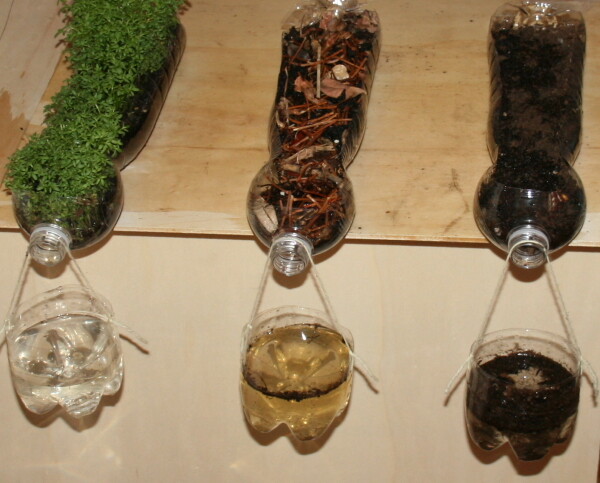
Prepare three identical plastic bottles, cut as shown in the pictures and put them on a flat surface (I’ve stuck with the hot glue on a tablet of plywood):
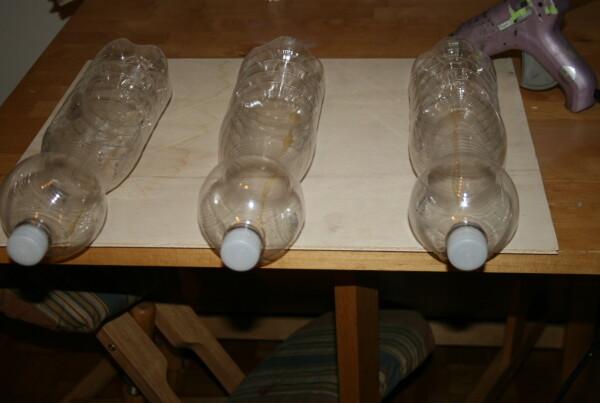
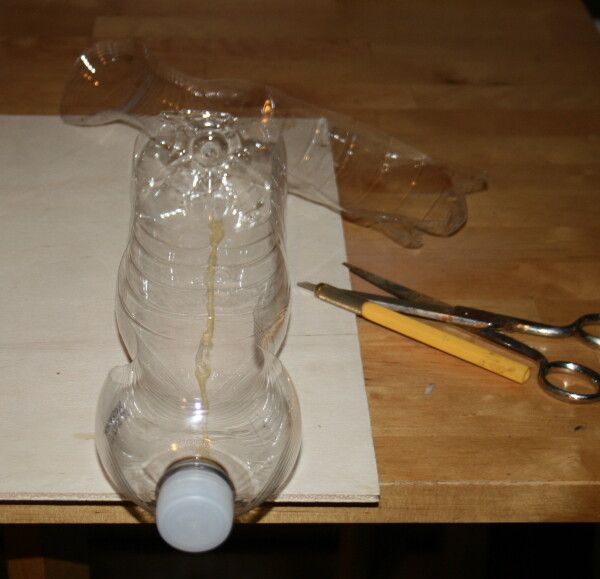
the opening of the three bottles should protrude a little out of the surface. Put in each bottle the same amount of ground and press hard to pack as much as possible. The ground must be below the level of the opening of the bottle:
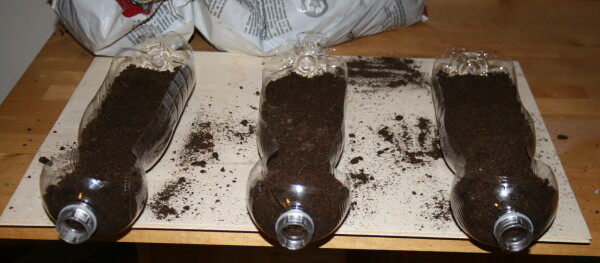
Cut the bottom of other three bottles of transparent plastic, and make two holes for the string. These cups will serve to collect, during the experiment, the water in excess, which reproduces the rainwater:
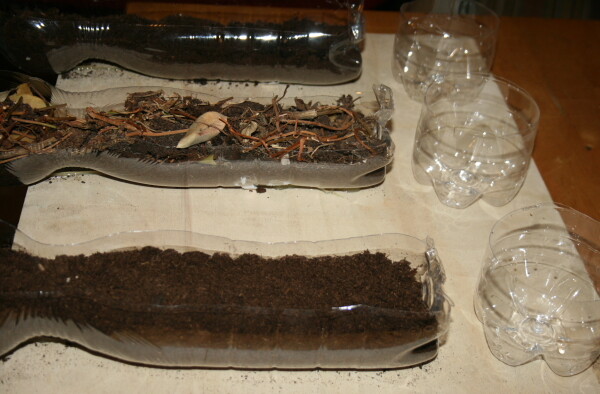
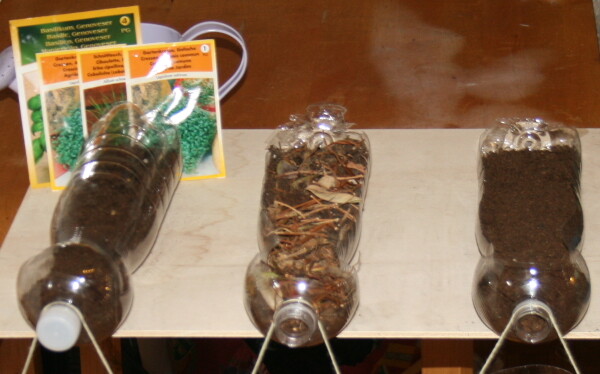
Then put the cap on the first bottle in which to plant the seeds:
put inside the second bottle some dead vegetal wastes (twigs, bark, leaves, dead roots). In the third bottle just leave ground.
Spread the seeds in the first bottle (I chose watercress, basil and chives), cover with a layer of ground and press a little, then watering; you can use the piece of plastic cut from the bottle to cover the soil seed like a greenhouse, which will help the seeds to germinate faster:
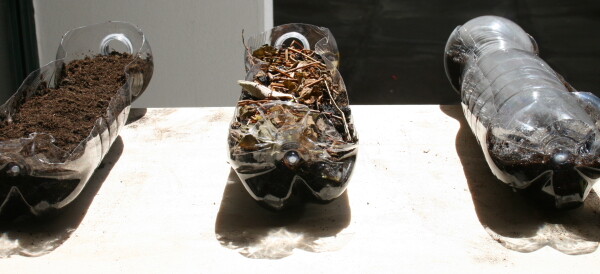
Expose to sunlight, and take care of planting until the plants are well developed. The actual experiment can be done only then …
This version is particularly suitable to be offered to younger children, because it generates curiosity and expectations, invites you to take care of sowing and stimulates the observation of the process of development of the plant from seed.
A process as complete teaches children many concepts that may appear “too complicated”, and creates a link with the real world: the plant is from seed (and not from the supermarket or florist). When, after a long wait and a lot of care, we have the plants in the first bottle, and after the children have watched day after day the other two bottles and cups, making all their questions, what they see will be unforgettable …
Without having to give specific verbal explanations (little ones can learn abstract concepts through their experience and not by our words), though perhaps only the older children come to the idea of soil erosion, surely everyone will clear the link green = clean .
If you do this experiment with primary school children, who have already studied about ecology, land degradation, landslides, deforestation, protection of watercourses, etc … all of these concepts will become experience.
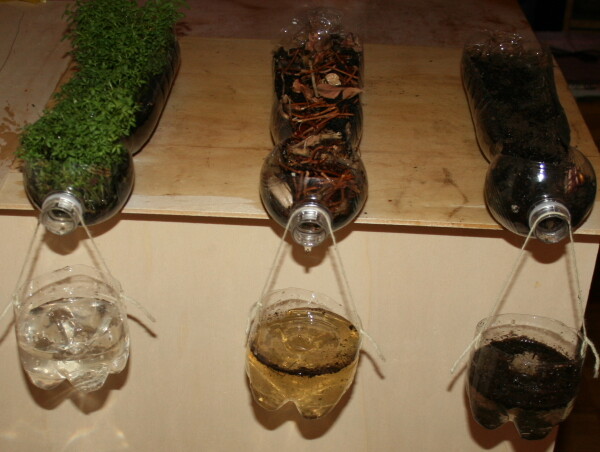
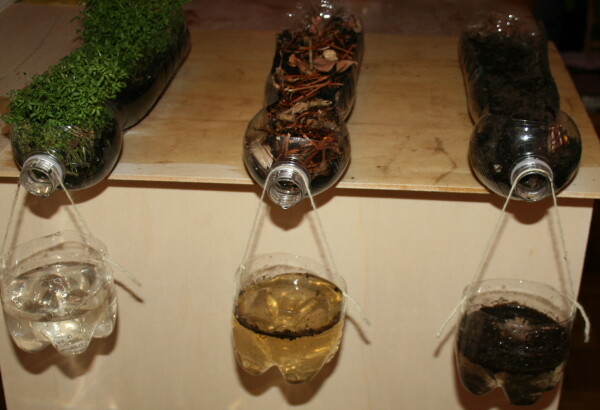
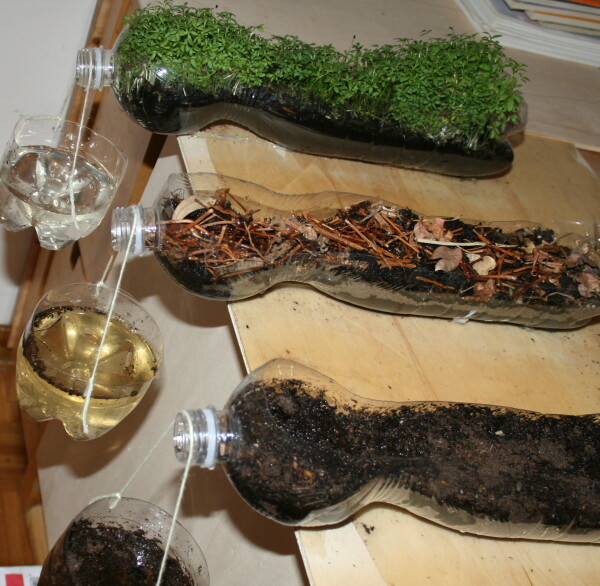
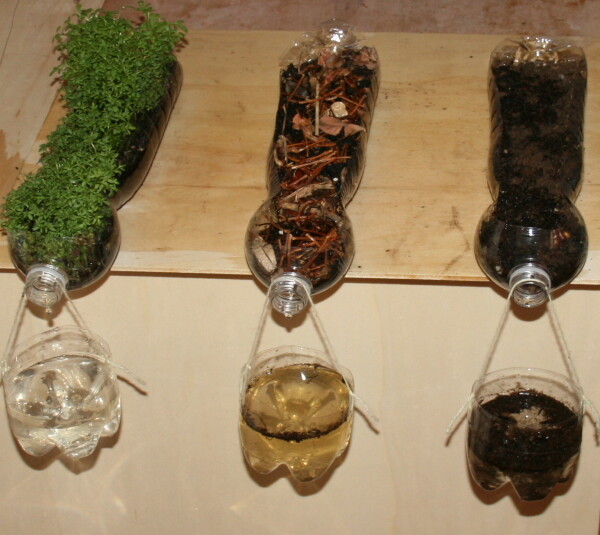
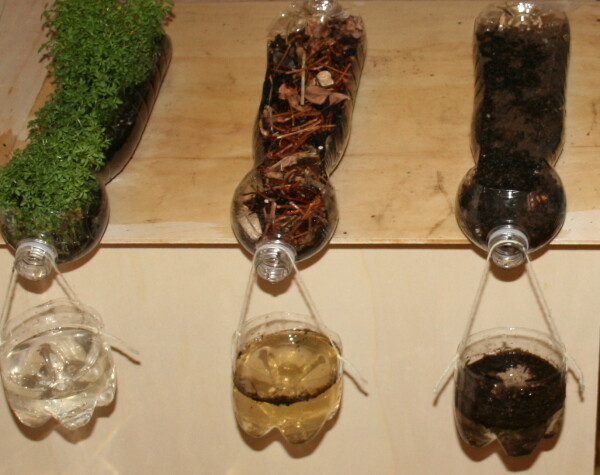
When the plants will be developed, we can see clear water out of the first bottle, and water progressively dirtier out of the second and third.
Here are the pictures taken two weeks after sowing:
Science experiment on soil erosion – Second Version
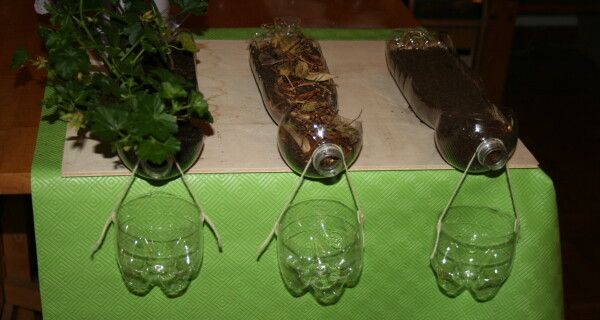
Speed up the process and replace the sowing with the transfer of plants already developed (I had geraniums):
of course, in this case, remove the cap also from the first bottle:
Pour the same amount of water in each bottle. To make it as clear as possible, and to learn each concept through direct experience, make a mark inside the watering can:
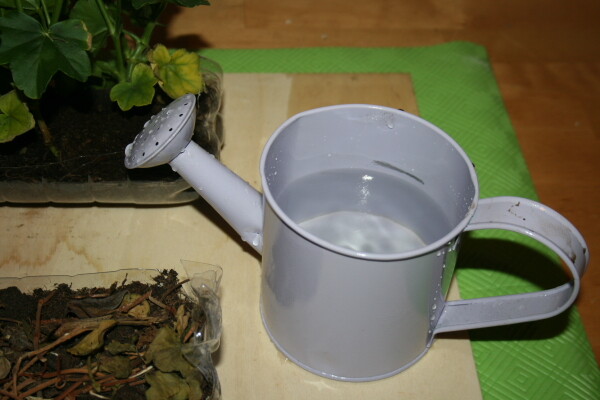
Pour the water into all three bottles, in all three at the same point (the end opposite the opening) and observe:
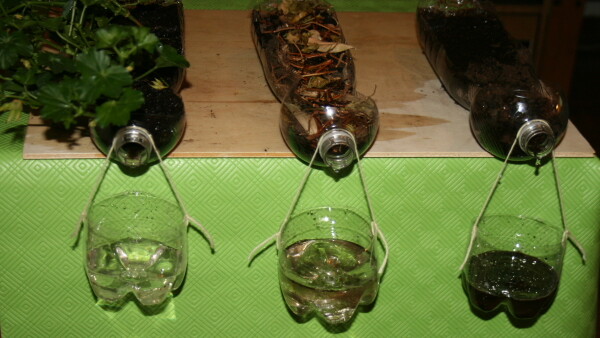
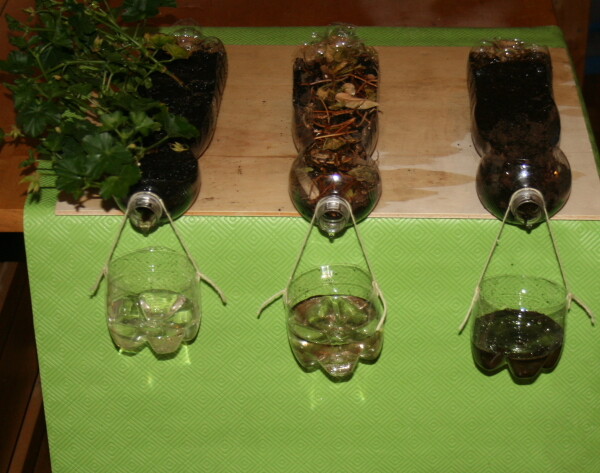
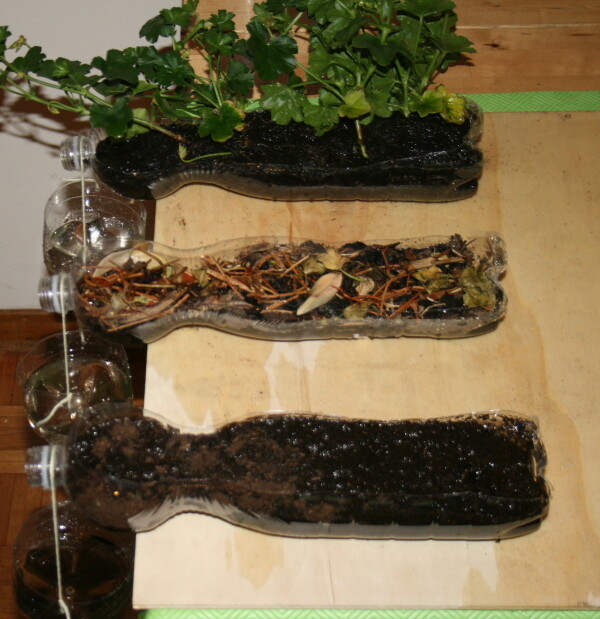
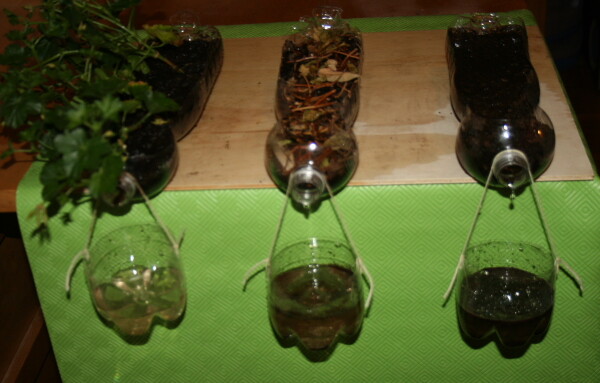
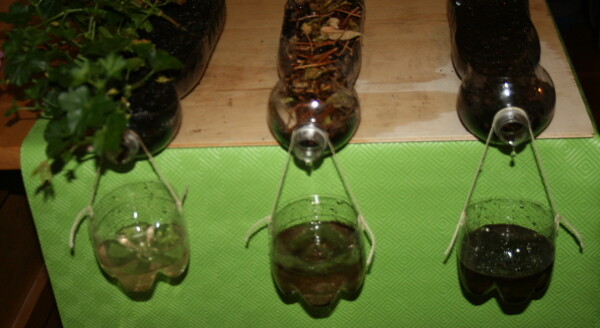
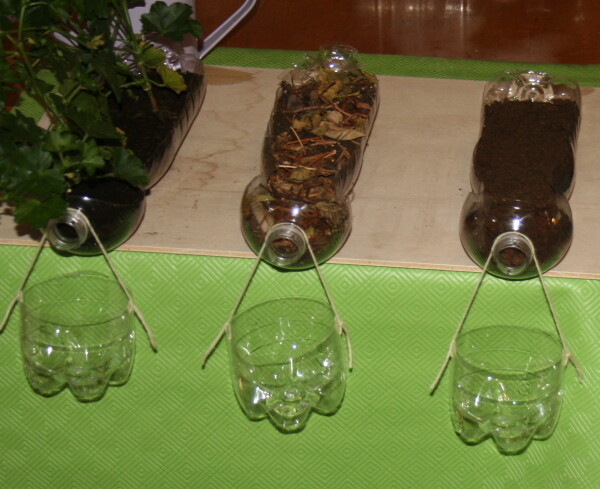
The images are taken in sequence.
Using plants already developed, as you can see, the water from the first container at the end of the experiment, it is not perfectly clear (inevitably, there will be some fresh soil around the root), but the water in the first bowl will always be clean compared to the water contained in the other two bowls.
Science experiment on soil erosion – Third version
This version of the experiment on soil erosion is suitable for children of primary school and beyond: it adds the seriousness of “taking samples of the soil.” With younger children, however, take samples of soil (especially living plants) can generate a negative impression. And so I can quote the inspirers of this experiment:
- Solo na escola – ESALQ solonaescola.blogspot.it
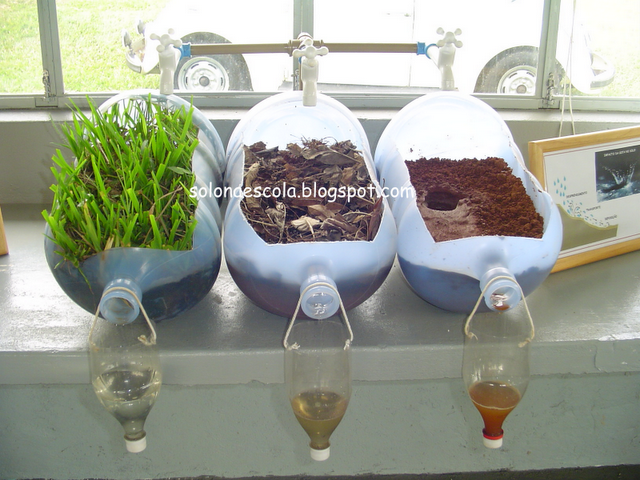
As you see, here were used larger bottles for the samples, and it is used for watering a tube with three taps (for this reason it is so evident the hole in the third sample).
It is to go outside and take three different clods of soil: a patch of grass alive, a ground covered with dead plant residues, a clod without any other element.
Open taps, but very little, so that the water drips slowly in each of the bottles, wait and observe.
It can also pour water without using taps, provided that each bottle receives, as already said, the same amount of water.
Visiting the blog (although in Portuguese) you can find other very interesting experiments and educational materials on the topic of soil erosion.
